Chia seeds pudding- a healthy and sweet staple that can be counted on as breakfast or even lunch. Busy mornings mean having no time to make breakfast. But with 10 minutes of prep the night before save you from starving the next morning.
It just demands 3 major ingredients along with some chopped fresh fruits or dry fruits as toppings. The toppings can be skipped, if you like pudding simple. So, let’s learn how to make chia pudding with easy steps.
Making chia seed pudding is a quick thing. The only delay caused is to assemble the required ingredients. So, take a look and gather the ingredients in the right amount:
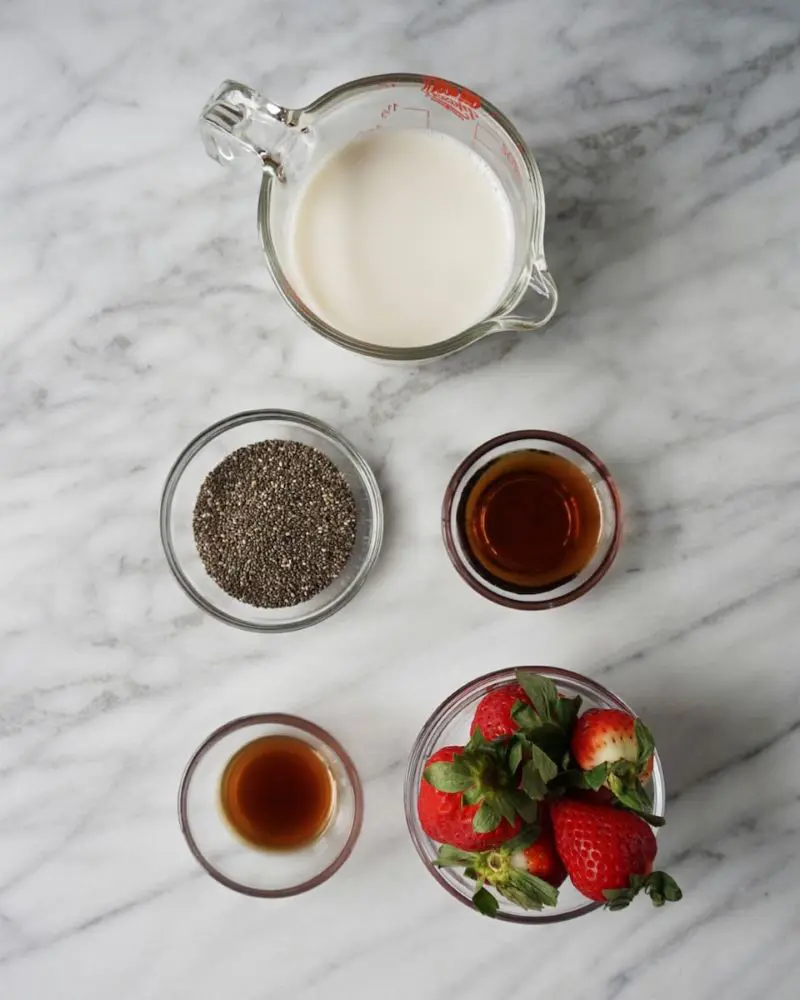
Almond Milk or Dairy Milk
Milk is a must-ingredient for pudding. No matter what pudding you make either rice or chia, milk’s presence is crucial. So, 1 cup of milk should be allocated. Use dairy or non-dairy milk, it is up to you.
Chia Seeds
Here comes the star of the pudding, chia seeds. These seeds come in two colors: black and white. You can use any based on the convenience. For 1 cup of milk, 3-4 tablespoons of chia seeds is ideal.
Maple Syrup
Pudding is incomplete without sweetness. So, add 1 tablespoon of maple syrup. As this ingredient brings sweetness to the pudding you can opt for honey in case maple syrup is not in stock.
Vanilla Extract
Make the pudding more flavorful by adding vanilla extract (1 teaspoon).
Toppings
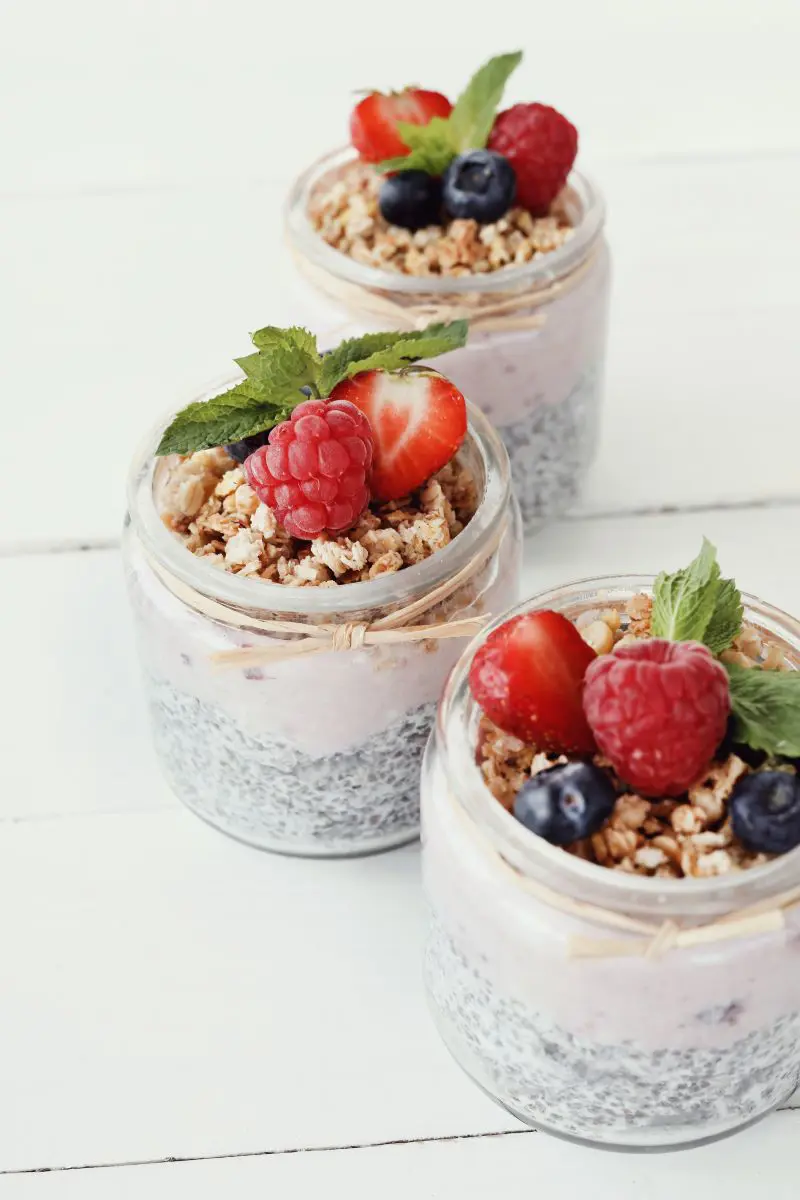
Chia seed pudding tastes more delightful when fresh fruits like blueberry, strawberry, and sliced bananas are added along with some dried fruits. Customize the toppings with your favorite fruit.
Tools Needed
A Bowl or Jar
Measuring Cup and Spoon
Whisk or Mixing Spoon
How To Make Chia Pudding
When the work of gathering ingredients and tools ends, it is time to move towards the chia seed pudding recipe. Its steps are easier and don’t take more than 20 minutes of your time. Let’s get started:
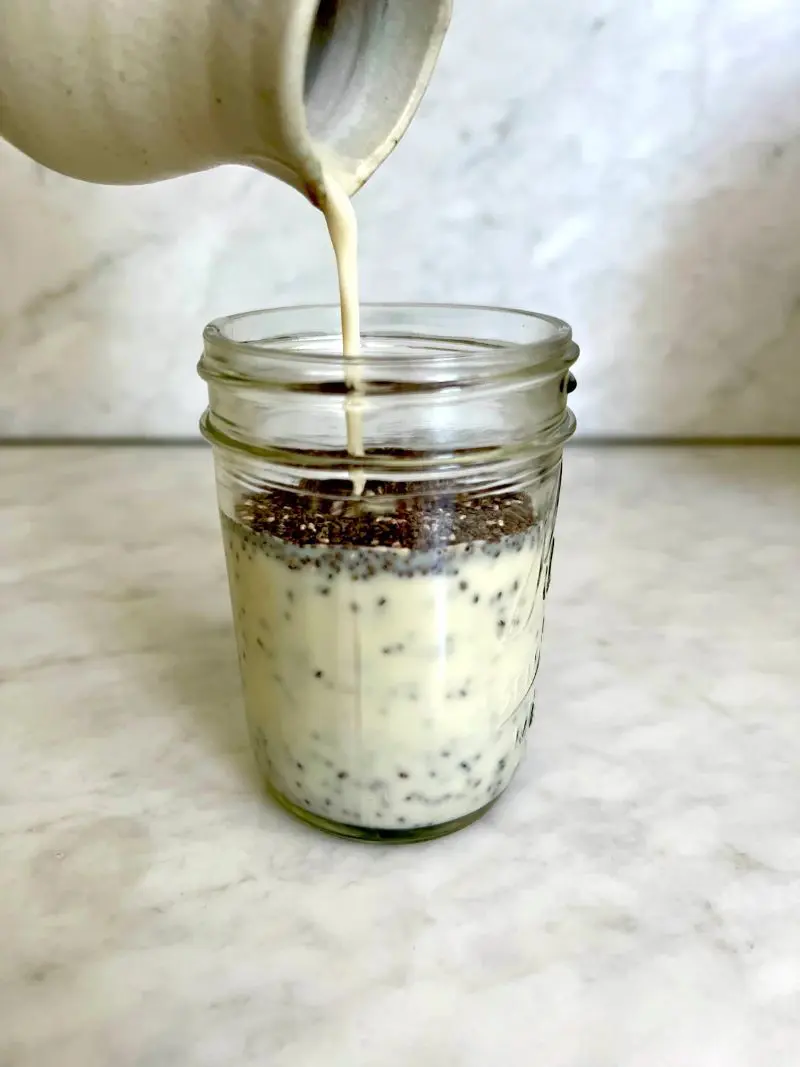
1. Assemble Chia Seeds and Milk in a Jar
The first thing you need to do is to bring chia seeds and milk in a jar or bowl. When picking the jar make sure to get medium-sized, as the chia seeds get fuller after mixing with milk.
So a smaller bowl or jar is not really an ideal one. But if the plan is to make pudding in small amounts then a smaller jar could be a good fit. Source : weelicious
2. Stir the Ingredients
Stirring chia seeds and milk creates a nice blend of ingredients. Initially, the texture would be lumpy and not consistent but as the stirring goes on the mixture turns into a smooth and consistent paste. And that’s how you know when to move towards the next step.
So, stir the mixture well using a whisk or a mixing spoon. Don’t do it with a rush. It will lead to spilling of ingredients so do it nicely.
If the milk is not enough to submerge the seeds, don’t hesitate to add more. As chia seeds have to be drowned with the milk to be soaked fully.
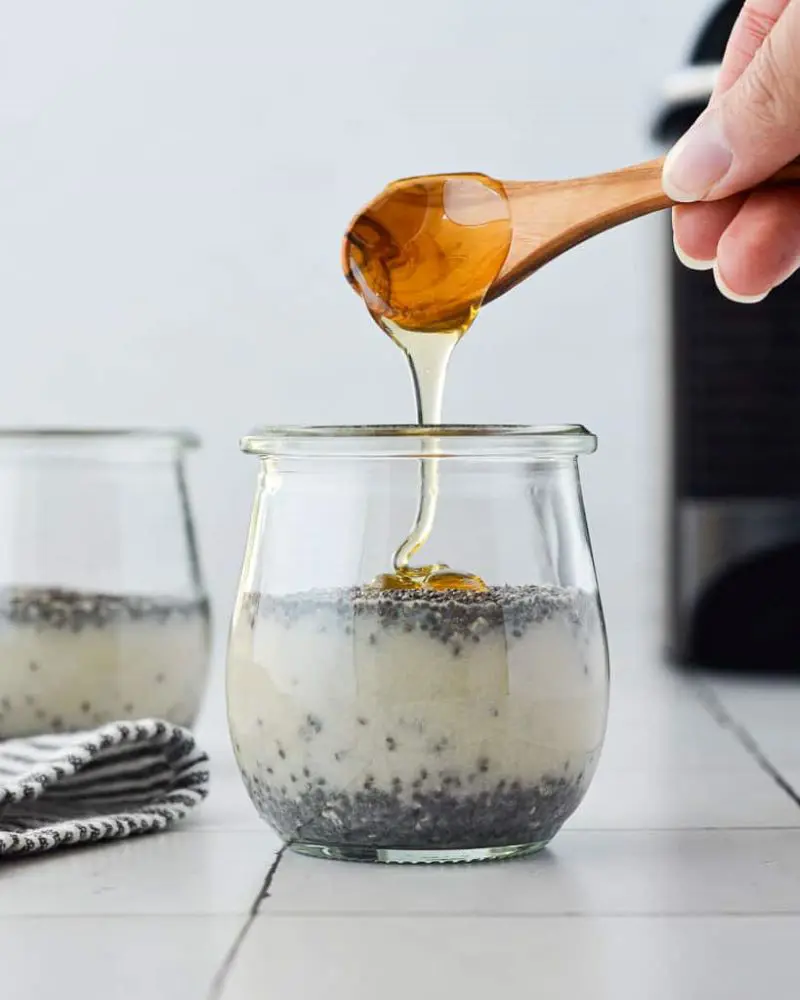
We can’t imagine pudding without sweetness. So add maple syrup or honey to bring sweet flavor in the chia pudding. Adjust the amount according to your liking.
For a more sweet taste, increase the syrup or honey by 1 or 2 tablespoons. This ingredient can be skipped if a sweet-flavored dish is not a good fit for the diet.
Just when sweetener is added, pour vanilla extract then stir the mixture well. The vanilla extract gives a touch of vanilla flavor to the chia pudding.
It is time to allow the pudding to rest. The pudding jar can’t be left open while resting so cover it with its lid or wrap it with plastic. Then go and keep the jar in the refrigerator for 2 to 4 hours or overnight.
This period is crucial as the chia seeds begin to absorb the milk along with maple syrup and vanilla extract. By the resting time ends, chia seeds become fuller in size.
5. Stir the Pudding Again
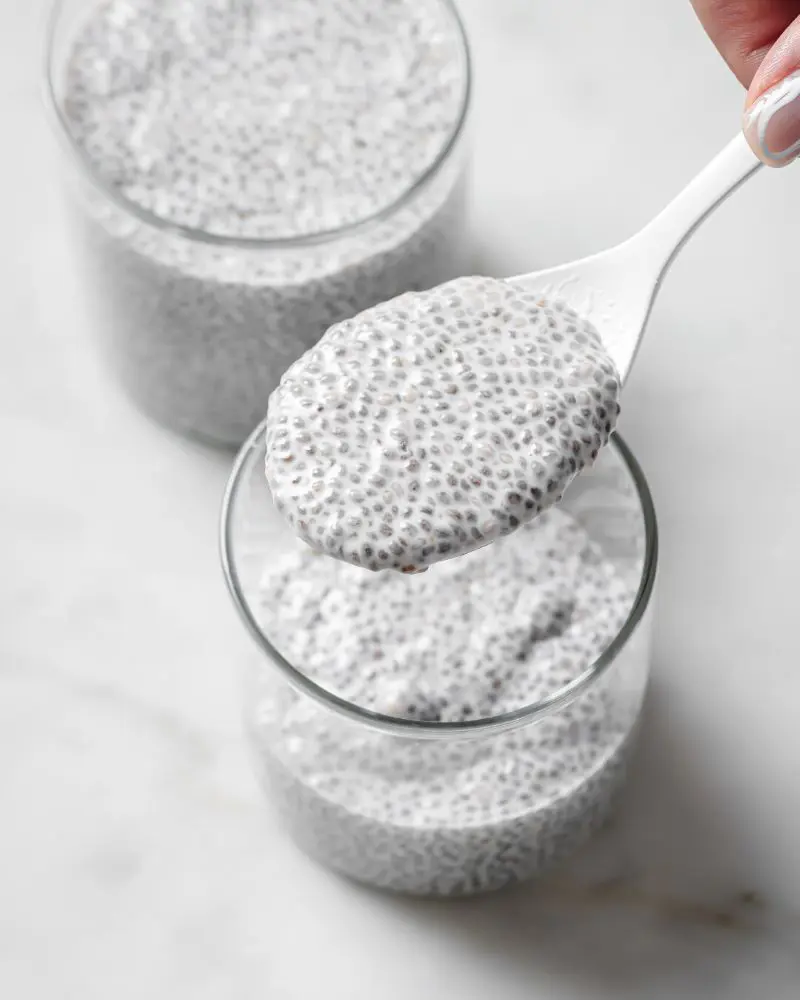
Set aside the jar from the fridge. Open the lid and whisk again with a whisk or mixing spoon. A few hours of resting changes the texture of pudding into clumps. So, this second time of stirring breaks the clumps and makes the texture smooth like cream.
Also, there might need to add some more milk as the seeds absorb the liquid and make the pudding too thick. If needed, pour some milk and stir until the texture becomes consistent.
And here comes the most fun part. Clean the fruits (strawberries and a banana) and slice them into smaller pieces. Include dried fruits like nuts or cashews.
Sprinkle the prepared toppings on top of the pudding. And there you have the sweet and creamy chia seed pudding ready. Enjoy the sweetness and delight your mood! Source : facebook
How To Eat Chia Pudding
Chia seed pudding can be consumed as it is. More flavors could be added as per the liking. Let’s look at some examples of eating chia pudding:
Layer with Yogurt
This asks for making layers with chia pudding and yogurt. First, create a layer of chia pudding and then pour some yogurt. Then again continue adding layers one by one and top with some fruits.
Add Fruits
This one is the most usual way to eat chia pudding. Simply, add chia pudding in a jar or bowl and then put some chopped fruits as per choice on top of the pudding.
Sprinkle Crunchy Add-ons
Dried fruits like cashews, almonds, and nuts are some examples that can be used as toppings on the pudding. Also pumpkin seeds, granola, or shredded coconut goes well. These add-ons give slight crunchiness and nice flavor to the pudding.
Mix in the Smoothie
Instead of eating plain chia pudding, mix the pudding with a glass of smoothie. Creating a layer of smoothie with chia pudding is indeed a good idea to enjoy creamy dessert.
Top on Toast
Use the same chia pudding to add top on crusty toast. This lets you enjoy a creamy, sweet and crusty flavor all at once. Topping chia pudding on pancakes, waffles or bread are some ways to eat it.
How To Store Pudding
Busy days demand quick breakfast and that is chia pudding. This means preparing the pudding in excess ahead of time. Leaving the pudding just like that is not an option. So refrigerate it.
In a clean jar or container, add the pudding and cover it with its lid tightly. Place the jar in the refrigerator and don’t forget to pick the coolest place in it. Otherwise, the pudding might spoil if proper coolness is not maintained. This way the pudding lasts for up to 5-6 days.
When the day arrives use the stored pudding, and stir it to bring back a smooth creamy texture. If needed, pour some milk. Top it up with your favorite toppings and enjoy.