Recipe

How To Cook Homemade Chili

Source : facebook

We all are very much familiar with the restaurant-bought chili. But have you ever tried the homemade ones? There's no comparison. The homemade chili holds rich and deep flavors that leave you asking for more. You can serve it with bread, baked potatoes, rice, and more.

Don't worry if you're a newbie, we have brought a full guide on how to cook chili in your home. You'll find everything from lists of ingredients, and cooking steps, to storage in case of leftovers and serving suggestions. 

Key Ingredients

Source : allrecipes

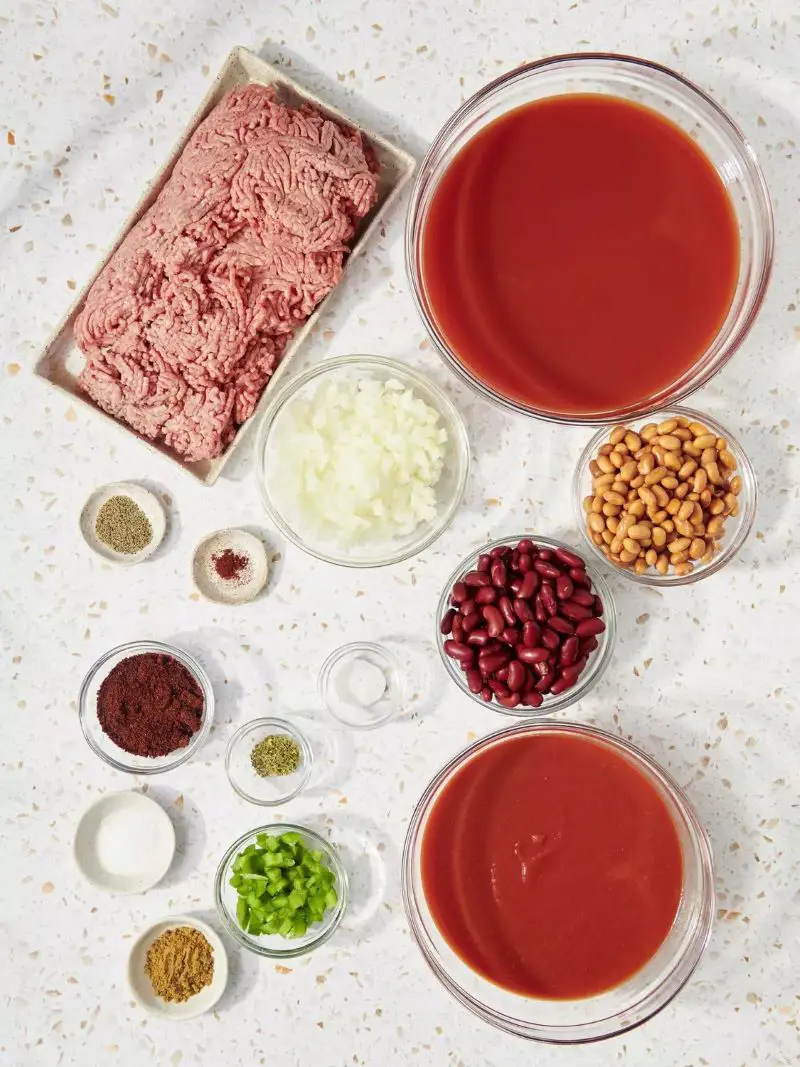
Chili is made from a combination of ingredients. Each one contributes to making the chili taste delicious. Some ingredients are in your kitchen while for others you'll need to tour the store. So, let's look at those ingredients and start collecting them:
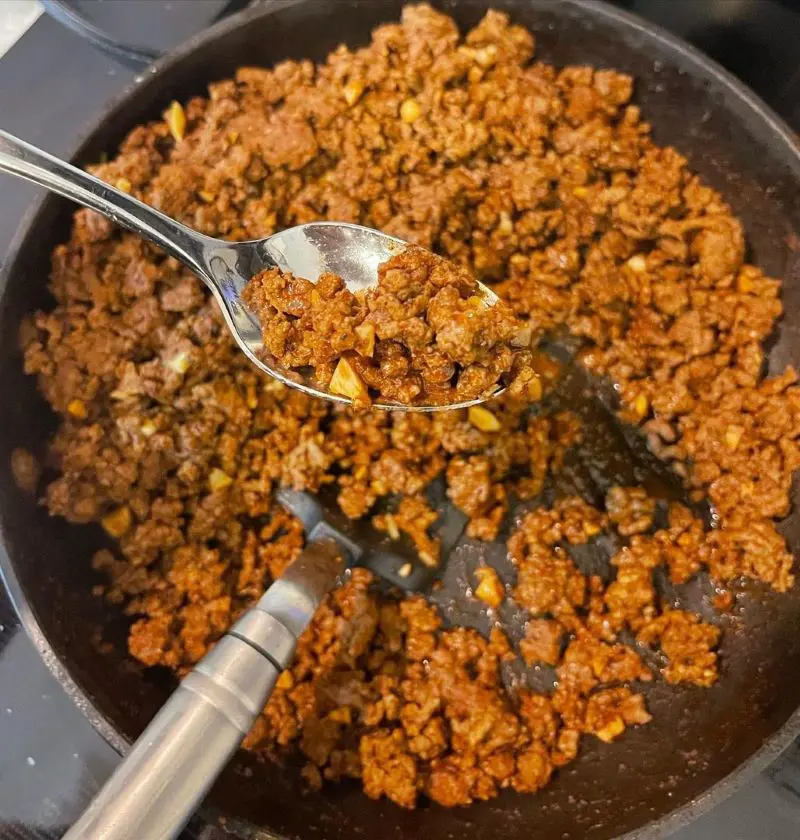
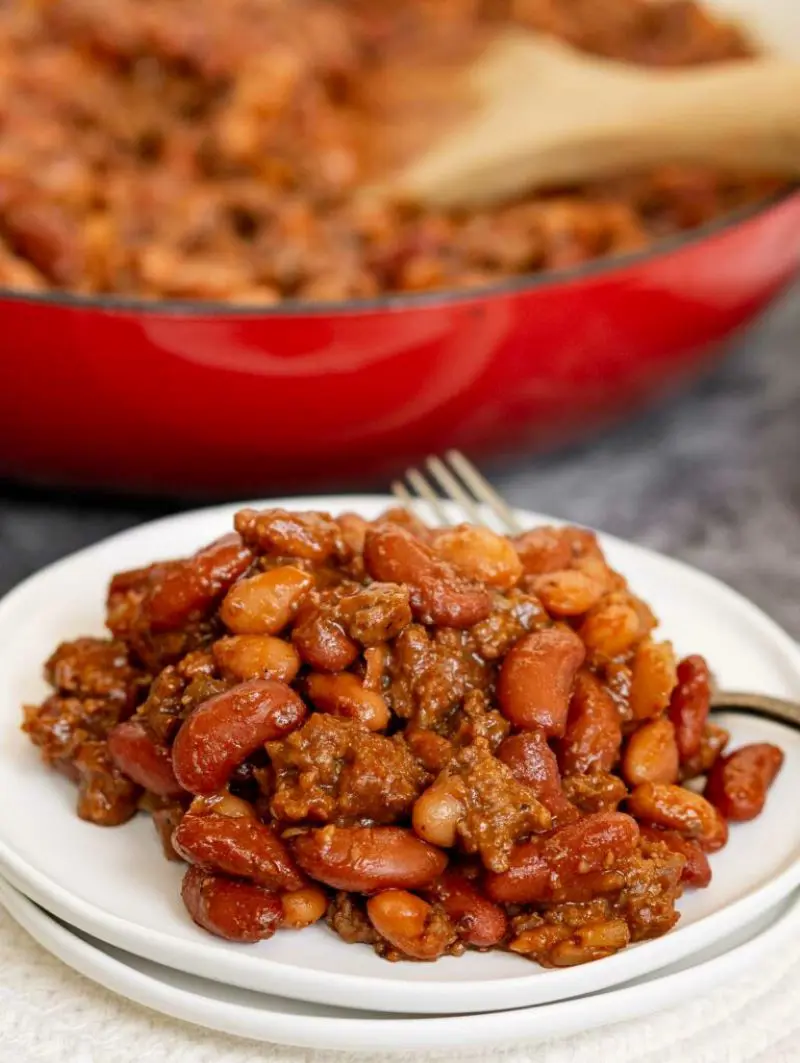
Ground Beef

This fills the chili with protein and makes it more delicious. So, choose the ground beef that is 80% lean and 20% fat, this ratio brings the best flavor.

If you want to replace ground beef with ground turkey or chicken, freely do that. As for vegetarians, opt for tofu or cottage cheese based on their preference. 
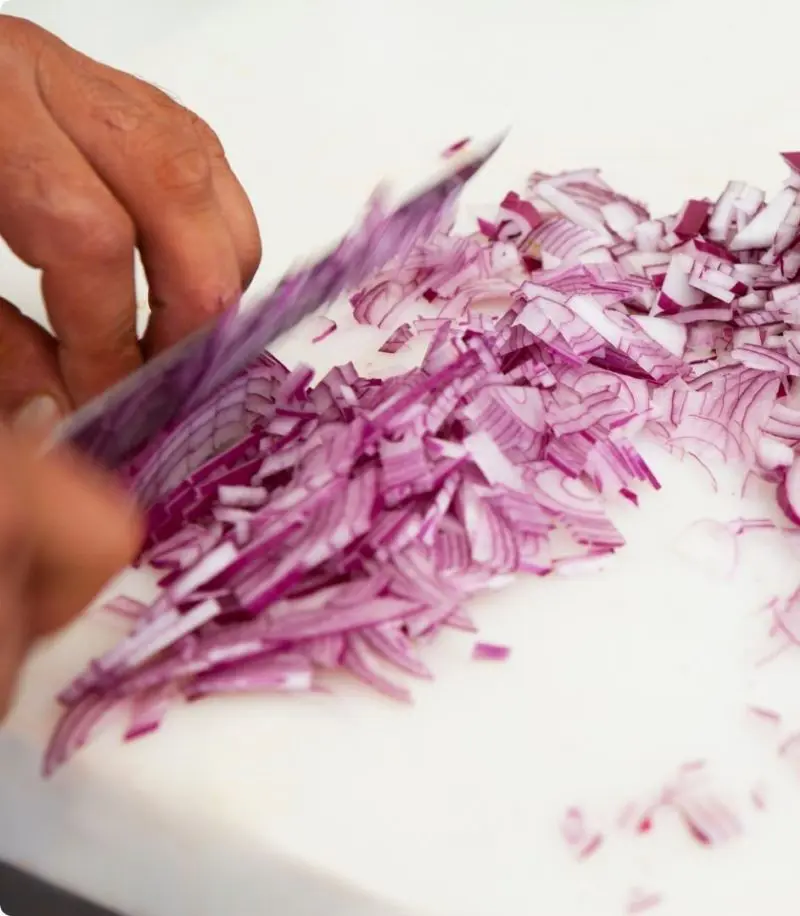
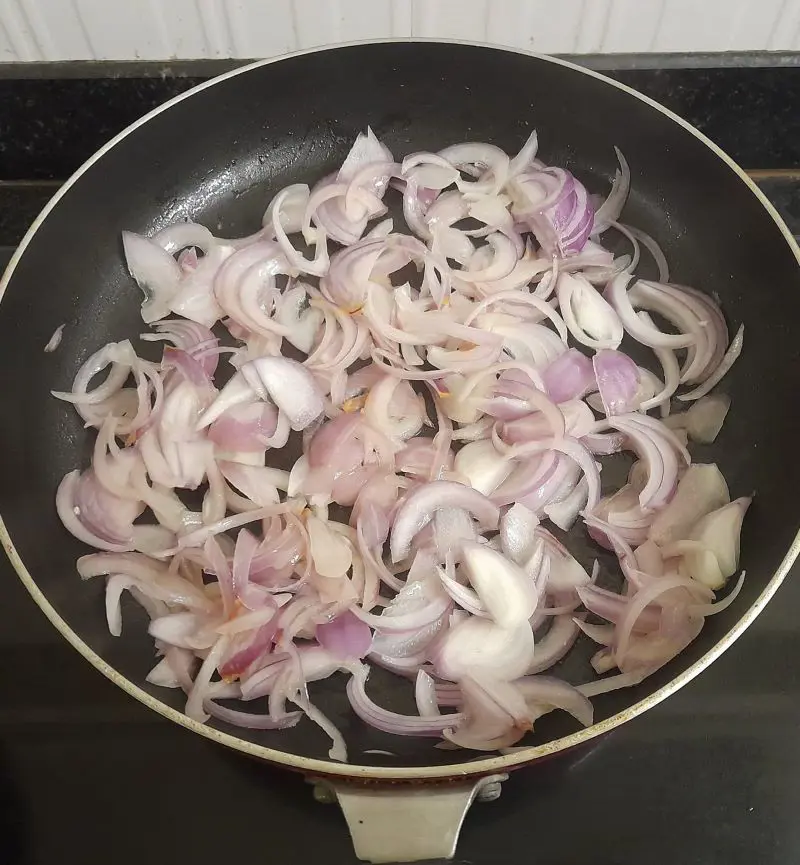
Onion and Garlic

These ingredients give a sweet and flavorful aroma to the chili. Garlic leaves a subtly sharp flavor and onion has that sweet and slightly spicy aroma, these when combined elevate the dish to a new level.

So, use some garlic cloves and onions. In case fresh ones are not in stock, you can use the powdered ones. They also do the work. 

Olive Oil

Oil adds moisture to the pan as a result prevents the burning or sticking of ingredients. Use olive oil for that. If it is not in stock, feel free to use any vegetable oil that is accessible. 

Tomato Paste

Tomato paste introduces a rich flavor and texture. So, grind some tomatoes and make it a paste or buy store ones. But remember this paste should go into the pan before the ground beef and spend some time cooking it deeply. That way the flavor comes out fully. 

Spices

Spices are the flavor enhancer. They hold the power to make a tasteless dish into a flavorful one. So, here we'll use salt, black pepper, chili powder or use chili powder substitute for the spicy kick, and dried oregano for a pleasing aroma. 

Don't hesitate to use other spices if you like but use them in the right amount. Otherwise, too many spices can make the chili taste way too bold. 

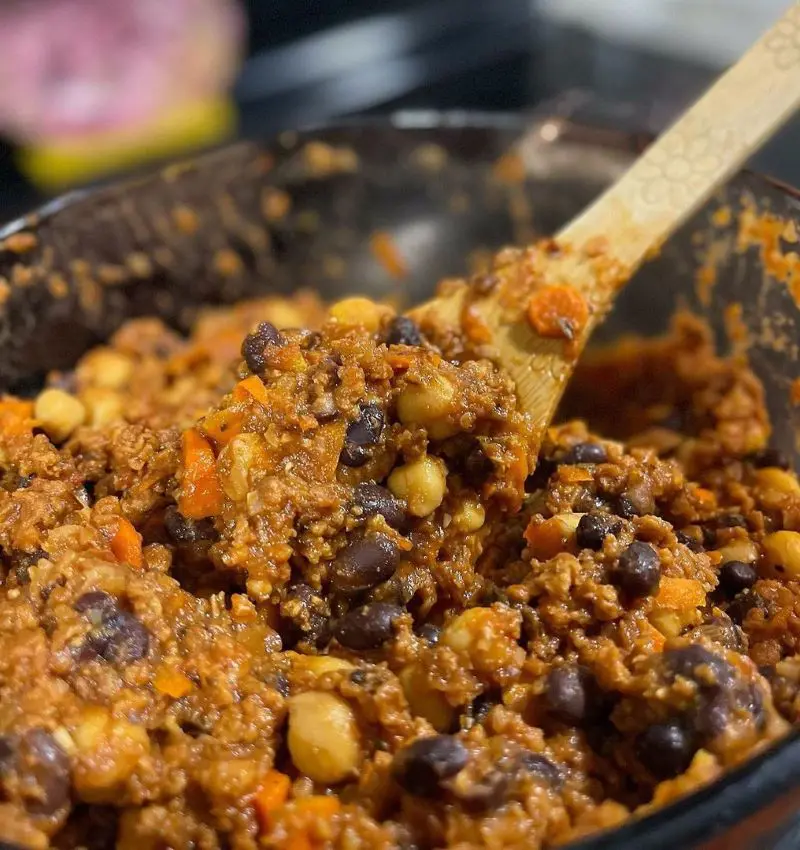
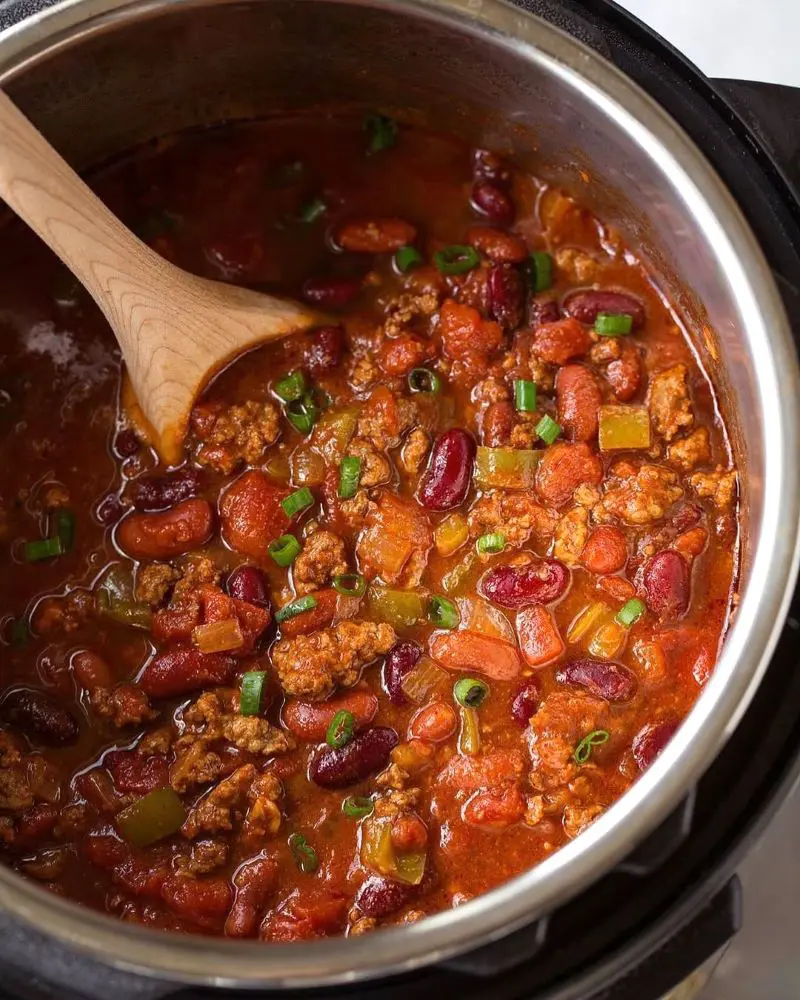
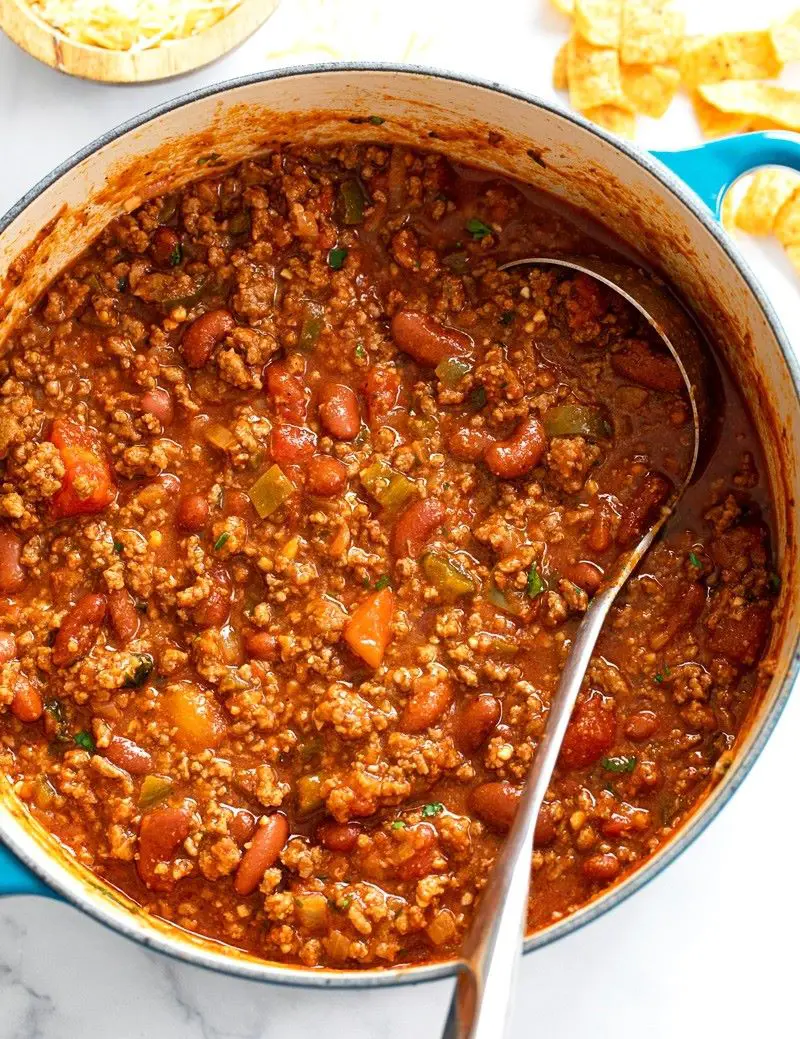
Kidney Beans (optional)

This one is not compulsory. But including the beans in chili surely makes it taste better. You can use any kind of kidney bean like black, pinto, or white beans, they will do the work too. 

Canned Tomatoes

A can of crushed tomatoes adds sweetness to the chili and gives that drooling red color. Get a can from the nearest store and make sure to get that one with a recently packed date. This indicates freshness and quality. 

Broth

Instead of using plain water while cooking the chili and ground beef, it is good to use broth (veg or non-veg). This adds a deep flavor to the chili. 

Fresh Herb

Though we have already included the dried oregano for the aroma, sprinkling some chopped fresh parsley or dill leaves makes the chili more appealing. 

Tools Needed

  • A pan or skillet
  • Measuring spoons
  • Spatula
  • Cutting board and knife
  • Serving plate and bowl

How To Cook Homemade Chili

Homemade chili recipes are easy to make. All you need is some ingredients and tools then you're all set for the cooking process. Without a delay, let's jump into the steps and learn how to make chili at home: 

Ingredient Measurements

  • Ground beef: 1 and 1/2 pound
  • Olive oil: 1 tablespoon
  • Onion: 1/2 large, chopped
  • Garlic: 3 cloves, 
  • Tomato paste: 2 tablespoon
  • Kidney beans: 1 cup
  • Canned tomatoes:
  • Salt: 1-2 teaspoons (adjust to taste)
  • Black pepper: 1/2 teaspoon
  • Chili powder: 1 tablespoon
  • Liquid: 1 cup
  • Dried oregano: 1 teaspoon
  • Fresh herb: 2-3 leaves, chopped

Step 1: Prepare the ingredients

Very firstly, let's prepare all the ingredients. Starting with garlic and onions. Peel off their outer skin and wash the onions thoroughly. Then, chop them into a fine texture, especially the garlic. That way the ingredients release flavors more intensely. 

Next, assemble other ingredients in a place and move towards the next step. 

Source : instagram

Step 2: Heat the pan

Ready the pan and sit it on the stove to heat. Let it be there for a minute and add olive oil. Again, leave the oil to heat for like 30 seconds or until it melts into a thin texture. 

Source : pexels

Step 3: Saute the onions and garlic

Onions take longer to get cooked than garlic so adding it first is a must. If you decide to add it with garlic, then the garlic gets burnt by the time the onion gets ready.

That is why add the onions first and stir them frequently using a spatula.  Once turned golden, add minced garlic and stir nicely.

Not stirring leads to the burning or sticking of ingredients to the pan's surface. And burnt onion garlic gives a slightly bitter taste ruining the whole dish. So, stirring is key.

Source : facebook

Step 4: Add the tomato paste

Pour the tomato paste into the pan. Initially mix the paste for 10 seconds then allow it to cook for about 3-4 minutes stirring in between. This cooking time is a must for the paste to cook deeply so that it gives a good base for the chili. 

As the tomato paste starts to become a bit thick and turn into a deep red color, know that you should proceed to the next step. 

Source : freepik

Step 5: Brown the ground beef

Let's add ground beef to the paste. We'll mix it very well with the cooked tomato paste by breaking the meat with a spatula. Now keep the heat on medium to low flame for smooth cooking of the meat. Because high heat will only burn the ingredients. 

Once mixing the ingredients evenly, leave the ground beef to brown for about 8-15 minutes. Cover the pan with a lid and leave it alone. A perfectly browned meat will have no pink color left, so make sure yours also is fully browned. 

The meat releases some moisture by the end of this process. So what you do is drain it with paper towels. For that, slightly tilt the pan this will assemble the moisture in a side of the pan and then you dip the towels and remove the excess moisture. 

Source : instagram

Step 6: Add the spices

Soon after the meat turns brown, add all the spices one by one. Start with the salt which balances the overall flavors. Then, include black pepper, chili powder, and dried oregano for more flavors. If you're using powdered onion and garlic, add them in this step. 

Once finished adding all the spices, give a good string to them in such a way that they combine evenly. This is important otherwise, the spices won't be distributed properly throughout the dish.

Step 7: Add the canned tomatoes and kidney beans

It is time for canned tomatoes and beans. Toss them in the pan. Blend them with the rest ingredients and do it until they combine together. 

Source : instagram

Step 8: Add the liquid and simmer

After the beans and canned tomatoes, the chili may become a bit dry so in this case pour a cup of broth. Use vegetable or meat-based broth. If it is not what you have, a cup of plain water would work too. 

Once added, stir the ingredients very well and you'll see a slight liquidy form. Now let the chili simmer for about 25-30 minutes with the cover on. Reduce the heat to a low flame, that way the chili cooks slowly and develops intense flavors. 

By the simmering time ends, if the texture doesn't meet what you expected then add more liquid, stir, and again simmer for some time. This is how you can get the desired texture in your homemade chili. 

Source : instagram

Step 9: Taste and adjust the seasonings

Before turning off the stove, check the amount of seasoning in the chili. Take some chili with a spoon and test it. If you feel the need to add something, go ahead and then give a good stir. Otherwise, your homemade chili is now ready to be served.  

Step 10: Serve and enjoy

Now, remove the pan from the stove and allow the dish to cool for about 5 minutes. Before serving, stir it one last time and serve it on a plate.

Then, garnish the chili with some chopped fresh herbs for a good presentation. Enjoy it with bread, corn, roasted veggies, or your favorite side dish. 

Source : facebook

How Long To Cook Chili

A nicely cooked chili is what we all carve for. The flavors are so mesmerizing that we keep on licking our fingers. You'll get full but your tastebuds will ask for more. So, this type of chili can not be made just like that, it demands some time and patience.

Cooking time is the great factor that influences the flavors here. Slow cooking yields deeper flavors whereas the quick ones will not match the level of slow-cooked chili. 

So, here's a brief guide on how long to cook chili: 

  • Quick cooking: The first 8-15 minutes will be for sauteing the onions and browning the meat. The chili takes about 25-30 minutes for simmering. This type of simmer gives a good and flavorful chili. 
  • Perfect cooking: It takes a bit longer than quick cooking. The simmering time is for 1-2 hours not including the sauteing time. This one requires you to cook the chili in low heat letting you enjoy a richer and more developed flavor. 
  • Slow cooking: Slow cooking means cooking the chili in slow cooker, unlike in a pan. This wants you to allocate almost a significant part of your day, 4-8 hours for simmering. The cooking process can be a little more tiring but the result will be worth the effort, giving a deep flavorful chili. 

So, choose the cooking time that fits your goal and availability since each cooking time serves a different level of richness and flavor.  

How To Store Chili

Source : instagram

Made chili in excess or have a leftover? In both cases, storage is the solution as you'll be able to eat the leftover ones whenever you want. So, here's a brief guide on that: 

Refrigerating

This storing method is suitable for short-term purposes. So, let's learn how to refrigerate chili: 

  • First, allow the chili to cool completely because storing the warm ones causes spoilage due to bacterial growth. 
  • Bring a cleaned jar or airtight container. 
  • Fill the container with the cooled chili and secure it with the lid tightly.
  • Ensure there is no chance for the slightest air into the container otherwise the air introduces contamination which spoils the chili. 
  • Use more than one container if needed. Follow the securing process with the rest. 
  • Place the containers in the spot which is the coolest in the refrigerator. 
  • Avoid the areas that are close to the fridge's door because frequent opening and closing of the door disrupt the flow of cool temperature which again may lead to spoilage of chili. 
  • Since coolness is the key here so maintain a constant internal temp of 37°F  or lower. 
  • The chili stays fresh for up to a whole week if the process is followed properly.  

Freezing

Freezing the chili is what you should do if you want to store it for months. So, let's learn how to freeze chili: 

  • Repeat the same cooling and container-filling process mentioned in the refrigerating section.
  • Pop the containers in the freezer.
  • Set the internal temperature around 0°F or lower. Because this is the recommended temp that keeps the chili fresh for up to 4-6 months. 

How to thaw frozen chili?

Here are some ways to unfreeze the frozen chili before use:

1. Thaw in the refrigerator

  • Remove the chili from the freezer and put it in the refrigerator.
  • Leave it there for overnight.
  • Next day, reheat the thawed chili on the stove and use it. 

2. Thaw in the cold water 

  • This method is faster than the refrigerator one. 
  • Fill a bucket or a large bowl with cold water.
  • Place the frozen chili container with the lid tightly on in that water.
  • Change the water every 30 minutes.
  • Continue this for 1-2 hours or until the ice melts inside the container. 

3. Thaw in the microwave

  • This method is even faster than the cold water technique. 
  • Transfer the frozen chili to a microwave-friendly bowl. 
  • Put the bowl inside the microwave and use the deforest setting. 
  • Microwave it for 3-5 minutes and stir every 2 minutes to avoid burning the chili. 

Serving Suggestions

The chili gives better flavors when paired with some side dishes. So, let's go through each one and try the pairing next time you decide to eat chili. Here we go: 

1. Cornbread

Source : instagram

This fluffy bread is what we all need for chili. Make the bread into parts grab that part and eat with chili, you'll experience heavenly flavors. This goes best as a lunch or a dinner. So invite your friends and let them feel the taste of homemade chili with cornbread. 

2. Baked potatoes

They give a delicious and fun way to complement the chili. The creamy and butter-loaded potatoes offer a smooth and comforting snack. Customize the toppings on the potatoes, you can top bacon bits, grated cheese, or any dipping sauce you like. 

3. Coleslaw

Source : instagram

This calls for the use of various green vegetables- cabbage, carrots, and cucumber. That means it is filled with several healthy nutrients. So serving coleslaw with chili becomes a healthy and tasty meal. Feel free to customize the veggies in coleslaw and prepare a bowl with the desired greens. 

4. Rice

Plain white rice is perfect for the spices-filled chili. Make a bowl of rice and eat it with the ground beef chili. I bet you'll love the combination. This tastes so hearty and comforting that surely gives you a feeling of fullness. 

5. Garlic bread

Source : instagram

Here comes another pair for chili. This soft bread absorbs the flavorful chili and allows you to enjoy the wholesome mixture of deliciousness. That's not all, the light and buttery textured bread fits nicely with heavy chili. 

6. Tortillas

Plain tortillas go pretty well with chili. Knead a dough and prepare some thin and soft tortillas, then serve it alongside the chili. Take some portion of chili with a piece of tortillas and feel the simple yet delightful combo. 

7. Roasted asparagus

Source : instagram

This healthy green is what you could be looking for in your chili. Get some fresh asparagus from the store and roast them in the pan or oven with a pinch of salt and black pepper. Side it with some spoons of chili for a healthy meal.