Kitchen Tips

How To Reheat A Baked Potato

Source : thatovenfeelin

Happy, satisfied, and proud from a day ago after making baked potatoes but wondering what to do with the leftovers? Worry not! You can reheat the baked potatoes the next day and enjoy it.

The perfect baked potato is crunchy on the outside and soft and light inside, it may taste better than a fresh one after a couple of days. Learn the fastest and simplest reheating techniques so you will never have any excuse for not making extra ones. Have a read on seven different methods on how to reheat a baked potato!

Best Ways to Reheat Baked Potatoes

When it comes to reheating meals, there is more than just one way to do it. If you have some leftover baked potatoes in your fridge and don’t want to waste them, these are a few ways of bringing those delicacies back from the dead.

From traditional oven baking to quick microwave warming methods or even crispy air frying techniques and flavorful grilling approaches, given are the 7 best ways in which you can revive baked potatoes. Each method has its advantages which cater to your tastes and needs ranging from a short time, textured food, or enhanced flavor.

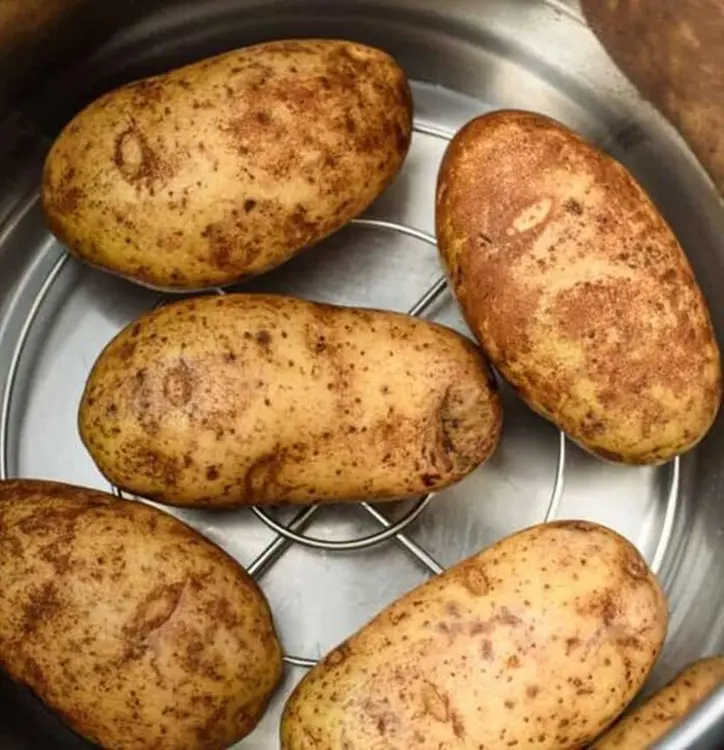
These methods are for russet potatoes, the gold standard for baked spuds, and assume medium-sized (8-ounce) potatoes. Adjust the heating times for potatoes that are much smaller or larger.

1. Oven Method

Believe it or not, when it comes to reheating baked potatoes, the oven method is the convenient way. This approach maintains that crunch on the outside and fluffiness on the inside, which is exactly what you are looking for in baked potatoes. This method works great when dealing with larger batches since it is very convenient for family dinners or when entertaining guests.

However, it may take a little longer than some of the quicker alternatives, but then again at least you won’t have to worry about your potato losing its original taste. Besides, because the oven has enough space a side dish can be warmed up with whatever else you are cooking at that time.

Steps:

  1. Prepare the oven at  350°F (175°C) to preheat it
  2. Before baking let the potato sit for 10-15 minutes until it comes closer to room temperature
  3. If you want to, rub the skin with olive oil or melted butter for extra crispiness.
  4. For the crispiest potato, place it right on your oven rack. Or, use a baking sheet with parchment paper.
  5. Heat for about 15-20 minutes. If the potatoes are bigger, it could take up to 25 minutes.
  6. Test the internal temperature using a food thermometer. It should reach 165°F (74°C).
  7. To brown it a little more, broil at the end for 2 -3 minutes.
  8. Remove from the oven and leave to cool for a while before serving.

Source : gimmesomeovcom

Pros:

  • It brings back the crispy texture of potato skin
  • The heat is spread equally around the potato
  • It is possible to heat several potatoes at once
  • Supports the simultaneous reheating of other dishes

Cons:

  • It takes a little longer time than other methods
  • It requires more energy to reheat
  • The oven has to be preheated

2. Microwave Method

Are you always in a rush? If yes, then the microwave method is for you. This will help you quickly prepare a simple lunch option. Although it isn't able to produce crispy skin like oven techniques do, it has advantages such as making the inside of the potato hot quickly and with steam.

This is especially perfect for single servings and can also be altered depending on the size of the potatoes. By following simple techniques, drying of the potatoes can easily be minimized while keeping the texture satisfactory.

Steps:

  1. Using a fork, stab to pierce the potato several times so that steam can escape.
  2. Place on a microwaveable plate.
  3. You may optionally wrap in a damp paper towel to help keep moisture.
  4. Microwave on high for 1-2 minutes.
  5. Check if there is enough heat by slightly squeezing (be careful, could be hot).
  6. If necessary, continue microwaving after every 30 seconds until heated thoroughly.
  7. Let it rest for 1-2 minutes before cutting into them to ensure an even distribution of heat.

Source : google

Pros:

  • Fastest technique
  • Energy-saving
  • Best suited for one serving
  • No preheating needed

Cons:

  • May result in uneven heating
  • Doesn’t make it crispy-skinned
  • Overcooking may cause drying up of the potatoes

3. Air Fryer Method

Source : airfryingfoodie

Using an air fryer to warm up your potatoes is a modern way that combines both speed and easiness. This method is ideal for those who enjoy slightly crunchy outer skin without adding oil. It is particularly suitable for small families or for situations when you are reheating one or two potatoes.

It helps in circulating hot air which ensures uniform heating, while maintaining the fluffy inside part of the potato. Moreover, since this technique takes very few minutes it’s ideal if you have very little time but still want nice-tasting meals.

Steps:

  1. First, preheat your air fryer to between 350- 400°F
  2. For extra crunch, you can spray or brush some oil onto the skin of your potatoes lightly.
  3. After that place each of them into their respective baskets ensuring that they are not overcrowded.
  4. Cook them for about 3 to 5 minutes.
  5. Remember to either shake the basket or turn around each potato at least once to enable even heating throughout.
  6. You should then check its internal temperature which needs to be at least 165 °F (74 ° C).
  7. Then allow them to cool down for 1 minute before serving it hot.

Pros

  • Fast rewarming time
  • Makes skin crispy
  • Saves electricity
  • Only require a small amount of oil

Cons

  • Not enough for more than 1-2 potatoes
  • Might become dry if cooked too long
  • Requires specific equipment like an air fryer

4. Skillet Method

Source : allrecipes

The skillet method provides a different texture to the original baked potato, resulting in a crispy, pan-fried alternative. This method is very ideal for using leftover potatoes for breakfast or as a side dish that has an interesting twist.

The golden brown crust forms on the slices when they are placed in direct heat while their insides become warm. Another advantage of this method is that it enables faster preparation of added flavors such as herbs spices or toppings at the same time reheating.

Steps:

  1. Cut your cold baked potato in the center
  2. Add some butter/oil to the skillet
  3. Stir until hot then put potatoes lying flatly
  4. Then wait about 3 to 4 minutes on one side before flipping them.
  5. Adjust seasoning accordingly 
  6. Lastly, you can drain excess oil with a paper towel-lined plate after removing it from the skillet when both sides are brown and crispy and the inside of it warms up

Pros:

  • Good taste and texture
  • Quick cooking time
  • Easy addition of new flavors

Cons:

  • The original structure gets changed
  • Requires constant attention while cooking
  • Extra calories may be added to cooking oil

5. Toaster Oven Method

The toaster oven cooking method combines the most effective ways. A great thing about it is that this option takes less space making it ideal for individuals that live in small places or those who want to avoid heating with their full-sized ovens. This technique is very good as it gives back the crispness of potato skin while keeping its insides warm and soft.

If you want to quickly reheat just one or two potatoes, which would be appropriate for individual meals or small families, then this method may fit them. Besides its small size compared to an ordinary oven allows it to preheat faster and cook food faster than it.

Steps:

1. Set your toaster oven to 350°F (175°C) beforehand.
2. For more crispness take potato rub lightly with oil on skin if you like.
3. Directly put the baked potatoes on the toaster oven shelves
4. If you have a ‘bake’ function in your toaster oven, select that option, so that it heats evenly.
5. Heat for 10-15 minutes. Vary the time depending on how big the potatoes are and how strong your toaster oven is.
6. Check the internal temperature of the potato, it should be 165°F (74°C).
7. The last 2-3 minutes should be on the broil setting if you want them extra crispy.
8. Allow them to cool down slightly before serving.

Source : toasterovenlove

Pros:

  • More power-efficient than big-sized ovens
  • Preheating time is shorter as well as cooking time
  • Crispy skin is achievable
  • Best for smaller quantities

Cons:

  • Few large potatoes can’t fit in their capacity
  • The baked potatoes can be messy

6. Grill Method

The grill method is a unique way to reheat your baked potatoes and it gets a nice smoky flavor. This procedure is perfect for outdoor cooks or if you are already using the grill to prepare other dishes. It is a great option during hot weather when you want to keep your kitchen from heating up.

High temperatures in the grill help crisp potato skins while warming them inside through and through. This approach can also be easily customized by adding extra flavors from wood chips or herbs placed on the grill which will enable you to take your reheated potato to another level.

Steps:

  1. Preheat your grill to medium heat (around 350°F or 175°C).
  2. Wrap the potato in aluminum foil. This helps retain moisture and prevents burning.
  3. If you want brush the potato with oil/butter before wrapping it up for additional flavor.
  4. Place wrapped potatoes on grill grates.
  5. Close the lid of the grill to maintain consistency in temperature.
  6. After 10-15 minutes remove potatoes from the grill, turning them every 3-4 minutes by turning them over time until they are all heated nicely.
  7. Carefully unwrap and check the internal temperature- go for 165°F (74°C)minimum
  8. For crispier skin, unpack potatoes then put them directly on the grates of a heated high-temperature, BBQ for two minutes on each side.
  9. Get off heat and allow it to cool down a bit before serving.

Source : pelletsandpits

Pros:

  • Adds subtle smokiness
  • Keeps your kitchen cool when it is hot outside
  • While grilling other meats can be reheated
  • Extra flavors such as wood chips, herbs, etc.

Cons:

  • Requires a grill in an outdoor space
  • Can cook only in good weather
  • May dry out if the potato is not properly wrapped
  • Requires constant attention to prevent burning

7. Steaming Method

When trying to reheat baked potatoes, one of the most efficient methods is known as a double boiler technique. It enables you to heat them indirectly while controlling the temperature and avoiding direct contact with flames. Although this method is a little slow-paced it still produces uniform results.

Steps:

  1. Fill the bottom pot of a double boiler with water until 1-2 inches deep.
  2. If you do not own a double boiler, a heat-safe container can be placed on top of an ordinary pot.
  3. Bring the mixture to medium heat until it simmers.
  4. In the upper pot or heat-safe bowl place your baked potato.
  5. The top pot should never sit in the simmering water as this will increase its temperature.
  6. Cover it with a lid.
  7. Heat for about 8 to 10 minutes, switching sides now and then for even warming.
  8. Finally, check if it is at the desired temperature and leave it for more time if necessary.
  9. Remove them and let them rest before serving

Source : pinterest

Pros:

  • Gentle even reheating
  • Maintains moisture
  • Least chance of overcooking
  • Can reheat several potatoes at once

Cons:

  • Slower compared to other approaches
  • Requires specific equipment or setup
  • No crispness on the skin

How Long Do Baked Potatoes Last?

Source : pinterest

The duration of baked potatoes being able to eat is estimated to be between 3 and 5 days. The following is a way that can be used to maintain their quality and safety for a short while:

Refrigerated Baked Potatoes

  • Put in a cold container or tightly covered in aluminum foil
  • Place within 2 hours after having been prepared

Room Temperature Baked Potatoes

  • Baked potatoes should not be placed flat on an open surface for over two hours. After this period they get into the region where germs thrive.
  • Consume within 2 hours when at room temperature
  • Throw away if left out more than 2 hours
  • Never leave out all night long

Frozen Baked Potatoes

  • If you freeze them, baked potatoes may last up to 8 months. However, the texture may change upon thawing and reheating.
  • Wrap them separately in aluminum foil then put them inside freezer bags
  • Defrost them in the refrigerator before reheating them
  • Optimal quality is obtained when consumed within 2-3 months