Kitchen Tips

How To Reheat Ribs 4 Ways

Source : freepik

Ribs are a less meaty part of the cut in the lamb, beef, pork, version, goat, alligator, etc. The most consumed rib is pork ribs, which come from the back and side of pigs. These are cheaper and commonly used in restaurants. There are also ribs from fish that are quite a popular choice of consumption.

Reheating the ribs means that it is the process of heating the previously made ribs once again after they have been frozen or refrigerated after it was made. After the ribs have been prepared to reheat, there are different other methods that are supposed to be followed.

Why Reheat Ribs

Ribs are a source of protein that not only are heavy on the taste but also on the stomach. These are good to use because by eating them, people can feel fuller for longer periods. With these here are some of the reasons why you might want to reheat ribs:

For the ease

Reheating the ribs is easier than preparing one. Just reheating the ribs can make the journey across the border named 'hunger' extremely short. It can be a great way to rest faster on a hectic day while eating your favorite without that much effort.

Reducing the waste

Making ribs once and eating them for up to another two days will reduce the clutter that happens during every preparation process. Once the rib is made, those ribs can be enjoyed without producing any waste for two more days.  

To save time

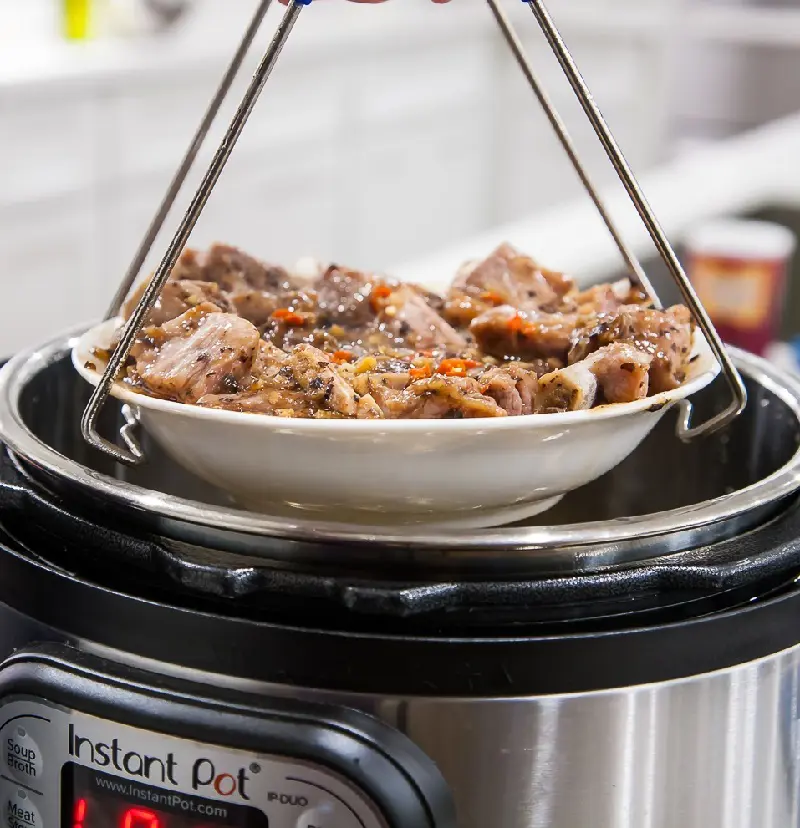
The whole process of cooking the ribs from the start is complex and time-consuming. If those leftovers or remaining ribs are reheated, the final product can come to the table in a short amount of time.

For the safety

Once the rib is cooked it must be stored well. As for the cold ones, there are many harmful bacteria in the ribs that are cold. These might have been attracted through the atmosphere or have been produced themselves. Therefore reheating can kill these making the ribs safer to eat.

Improving texture

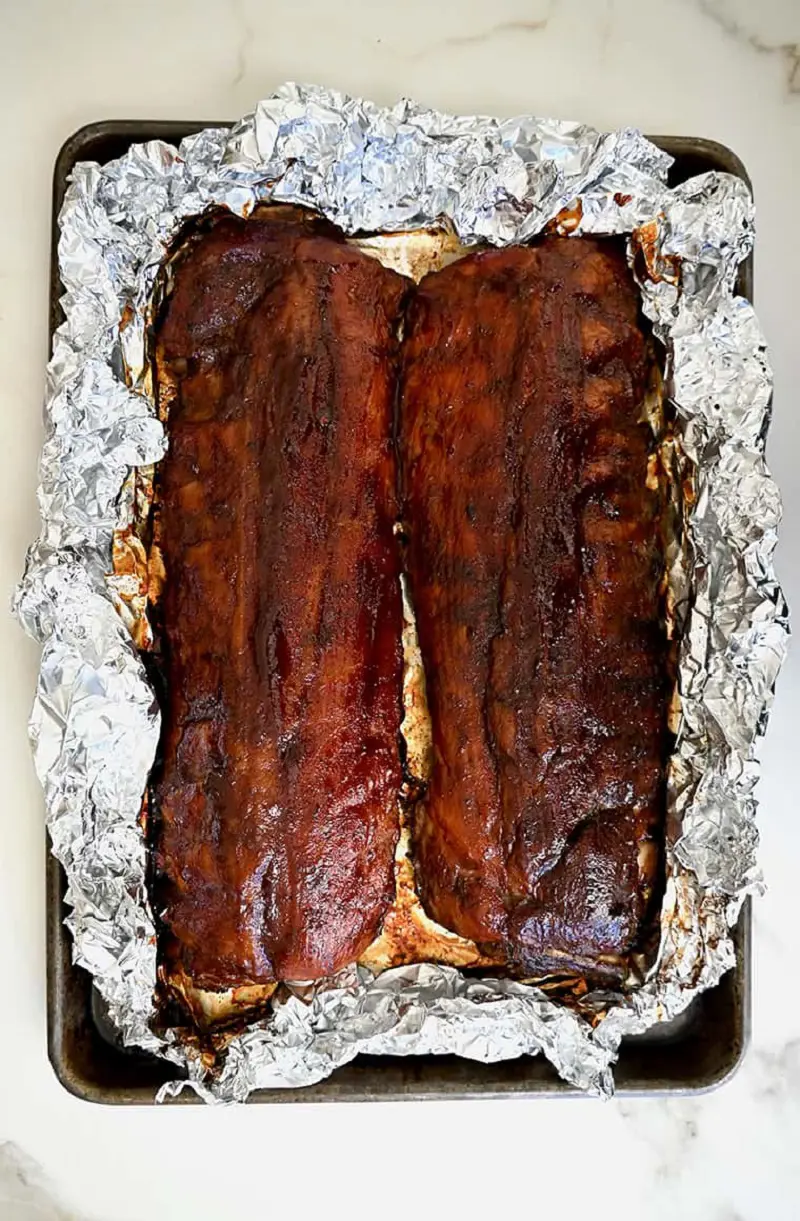
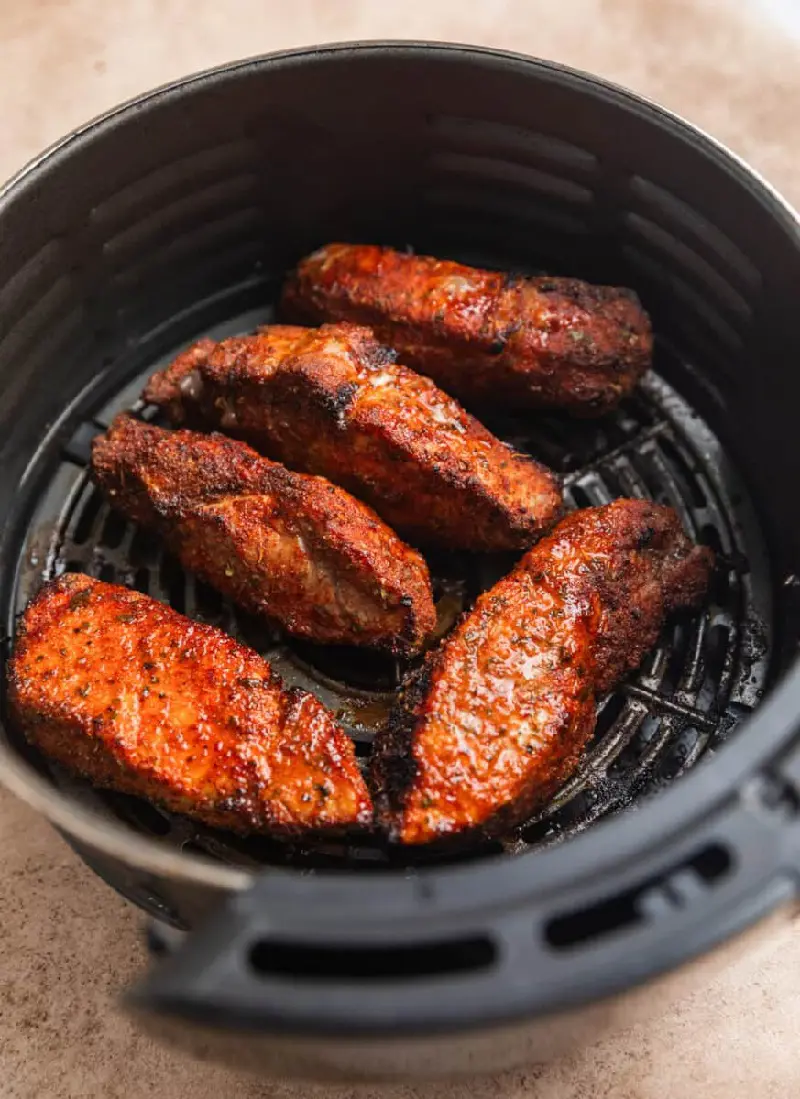
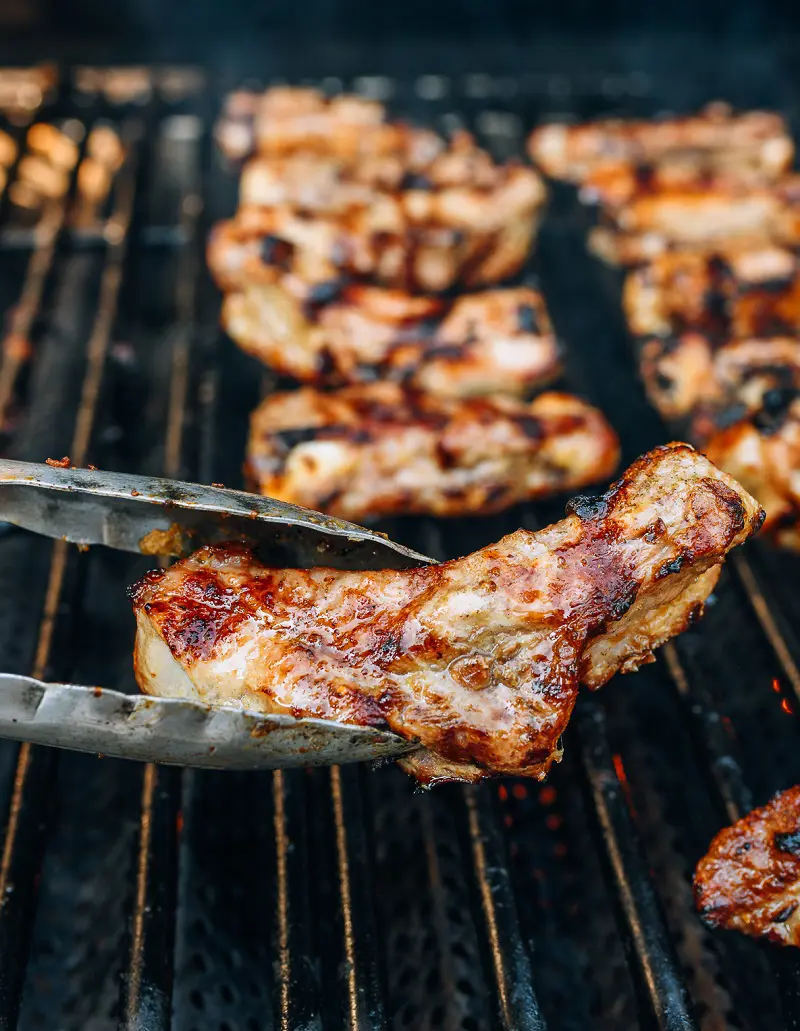
When the ribs are cold, they are stiff and tough to touch, which is not a texture that is enjoyable or palatable. But reheating retains its moisture and makes it soft, improving the texture of the ribs and making it palatable.

To enhance the flavor

Before reheating the cold ribs they can be seen as having turned rubbery, and chewy in the stiffness that blocks the flavors from reaching to the taste buds. However, the moment those ribs are reheated, they will release their locked flavor.

With this, the ribs will also become juicy on the inside and crispy on the outside due to the reheating process. Thus enhancing the flavor.

Preparing Ribs Before Reheating

Although the ribs are generally preferred to be stored in a refrigerator, if they are frozen sealed in the freezer they can be stored for a longer period. Reheating these ribs after they are taken out from the refrigerator or the freezer is a big 'NO'. Before continuing to start with reheating, some of the things are needed to prepare the ribs for the reheating process.

If the ribs are kept in the freezer, take the ribs out and submerge them into normal tap water collected in a bowl. Change the water every 15 minutes until the ribs have got rid of all of it's frost they got from the freezer. 

If kept in the refrigerator only, those ribs will also have to be brought to room temperature. Let the ribs sit on the countertop for 30 minutes and wait.

The ribs should come to room temperature before they are reheated. After the ribs's temperature reaches room temperature, take some BBQ sauce, hot sauce, or any other sauce of personal preference and apply them evenly in a thick coat on all the exposed surfaces of the ribs using a brush. After this, the ribs are ready to be reheated.

How To Reheat Ribs

Among so many ways and methods of reheating, here are some of such methods that are easier to use and follow by being easily accessible. However, all these methods also have some positive and negative aspects that need to be known before using these methods.

Although to know the time consumption, it all depends on the size, texture, and the previous stored method to know how long the reheating will take. The reheating not only provides above mentioned benefits it also helps to upgrade the skill of the maker as it is easier to experiment on as well.

1. Oven Method

It is the method of reheating the already-cooked ribs using the oven as a reheating tool. The ribs reheated using the oven are evenly heated and properly done. There are pros and cons of this method which are given below:

Prepare the oven

Turn the oven on. Oil the baking sheet and layer it with the parchment paper. Put the baking sheet into the oven, turn the temperature up, and preheat at 110 degrees Celsius for 10 minutes.

Placement

Coat the ribs in sauce and cover with aluminum foil after adding a little water or juice. After 10 minutes, take the baking sheet out of the oven and place the foiled ribs on the sheet. Then put the rib-filled baking sheet in the oven to reheat.

Reheat

Close the oven door when the ribs are placed inside the oven. Heat the ribs which will take about 25 to 30 minutes in that enclosed space.

Doneness

After 25 minutes are over check the inside temperature of ribs with a thermometer. The temperature of the insides of the ribs must be a minimum of 190 degrees Celsius to a maximum of 200 degrees Celsius. Anything more than this temperature will overcook the rib.

Serve

Once it is done, serve them on a plate or a platter with some sauce on top and stir-fried vegetables on the sides.

Source : justataste

Pros

  • Moisture: Reheating using an oven prevents the drying of ribs as there will be minimum water loss. Thus helping the ribs retain their moisture.
  • Texture: When ribs are roasted, it is because of the water content within them that their texture doesn't change much. Thus, it looks and feels almost similar to the original ones.
  • Simple: Reheating in an oven is a simple method that can be done even by beginners. Those steps are quite straightforward and require little to no special tools.

Cons

  • Uncertainty: While reheating the ribs in the oven, the most worrying part is the time and duration. It has no specific time for reheating in the oven as the duration depends on the size of the ribs. When cut into pieces, it can take less time but if the whole rack is being reheated, it takes more time for the rib to reheat.

2. Air Frying Method

Reheating the ribs in an air fryer that were previously made after they had been frozen or refrigerated after it was made. The process of reheating in an air fryer also has its pros and cons which are here below. 

Prepare the air fryer

Turn the air fryer on. Line it with a parchment paper or an aluminum foil. Turn it up to 180 degrees Celsius and preheat the air fryer for 5 minutes.

Placement

After preheating the air fryer. Take out the basket and put the pieces of the ribs inside the basket base individually without overlapping with each other. Don't cover the air-passing holes under the base above the cooking tray.

Reheat

Put the basket inside the air fryer and let it reheat for 3 to 5 minutes. After those minutes, shake the food or flip it upside down and heat it again on the other side for the same duration.

Doneness

See if the surface has become crispy. When the desired crispiness has been achieved, it can be said to be done.

Serve

After done, serve these on a plate with some caramelized vegetables with seeds on the side and some sauce of choice on top. 

Source : kitchenkonfidence

Pros

  • Moisture: The air fryer uses hot air circulation to cook or heat the ribs. This hot air assists in keeping the moisture intact not letting the ribs become chewy. 
  • Crispiness: The air fryer uses high heat which is responsible for giving a very crisp outer layer while still keeping the juiciness in the inside layers.

Cons

  • Limits: The air fryer has its limits regarding the quantity. Because the air fryer baskets are small, they have a limited area in which the ribs can be kept to reheat. The ribs might have to be reheated multiple times dividing into multiple portions. 
  • Uneven: The air fryer has its cooking tray at the bottom and as the heating is done through generated air, the bottom cooks first. This is why the ribs should be flipped upside down to air fry the same portion for the second time. 
  • Texture: Although air fryers retain moisture the heat that is used inside is extremely high. The crispiness that some enjoy some may not find it favorable. Thus the texture change might be a little off-putting for some.

3. Grilling Method

The process of reheating the cold ribs that were previously cooked with the help of a grilling pan or grills is known as the grilling method. This method has some pros and cons, which are mentioned below.

Prepare the grilling pan

Turn the grilling pan on and set its temperature to high. Preheat the pan for two minutes undisturbed. After the grill's heat is high turn the temperature down to medium.

Placement

Unroll the aluminum foil and put the ribs in the middle. Coat all the exposed areas with the sauce of choice and a little juice. Cover the rib from the top with more aluminum foil. Wrap the ribs closely in the foil but the juice must not leak. 

Reheat

Grill the wrapped ribs by placing them over the heated pan. Place the foiled rib bone side down to grill it at the temperature. Once the temperature requirement is met, uncover the ribs from the foil, and grill directly for some more time. 

Doneness

The temperature of the ribs must be constantly in check with the help of the thermometer. The internal temperature of the rib covered in the aluminum foil must not exceed 74 degrees Celsius.

Serve

After done, serve it on a plate in pieces and pair these ribs with some creamy potato salad with bacon. 

Source : thewoksoflife

Pros

  • Crispiness: The pan is extremely heated when the grilling is done. This leads the heat to pass through the top layer quickly giving a texture of crispness.
  • Experience: The grilling pan leaves the marks of the grills on the surface and the fire that gives heat from below the pan emits smoke that the ribs embody. This will give the ribs a smoky flavor and the marks make it look appetizing enhancing the flavor and the overall experience of the ribs.

Cons

  • Drying: As the heat the pan emits is extremely high at the beginning, if not handle the ribs well, the heat can pass through the top surface of the ribs, drying the water inside. This has the risk of making the grilled ribs very dry. Therefore this process needs skill.
  • Uneven heat: Because the grilling pan has grills in it the gap between the grills is empty. This does not let the heat distribute evenly on the rack of ribs while grilling.

4. Steaming Method

Reheating on a stove using a steaming method is amazingly easy yet best at retaining the original flavor and reviving the previous texture. This method also carries some of the pros and cons that can have an impact on the choice of making which are been given below:

Prepare the steamer

Take a large steaming vessel, and pour water in it. Broth or beer can also be good substitutes. Heat the water and then put the steamer basket in. Cover the vessel with the lid to heat the steamer.

Placement

Once the steamer is covered in steam and is well heated, put the sauce-coated ribs with spices and herbs inside the steamer basket and dip it inside the simmering water.

Steam

After done, cover the lid and let the ribs reheat. Let the rib stay in the basket dipped inside the vessel reheating with the steam the water is producing. It will take about 30 minutes of steaming after which the rib can be checked if the required temperature has been reached.

Doneness

To check the doneness, use a thermometer and check the inside temperature, if the temperature is 63 degrees Celsius to 71 degrees Celsius, then the ribs can be taken out to be served.

Serve

After the ribs are done, it can be enjoyed by various methods. Serving the ribs in an instant pot recipe is the best way to do so. It can make the whole meal mouthwatering and change the meal highlights.

Source : asiancookingmom

Pros

  • Moist: The steamer is constantly heating up with the help of water vapor that is trapped under the lid. This does not let the rib lose its moisture and as a result, the ribs are in their juiciest form.
  • Healthy: This method is one of the healthiest ways a rib can be enjoyed. Steaming the ribs neither requires oil nor other greasing agents which makes it a healthier option.
  • Flavors: Aromatics and herbs can be added to the water which will steam the ribs. Those aromatics will be mildly embraced by the rib. But it will be done so well that it will instead of overwhelming, the taste of the rib will amplify.

Cons

  • Tools: To steam the rib, tools like a steamer and steaming basket are required which can prove to be a little hassle sometimes for cleaning them later.
  • Texture: Although this method keeps the rib moist to its best, it will not look like the originally made one. 

Tips For Reheating

Here are some of the simple tricks and tips that can influence and even upgrade the outcome of the reheated ribs.

  • Do not keep the ribs at room temperature for more than 2 hours.
  • Do not let the frozen ribs sit on the countertop thaw itself overnight, it will spoil the meat.
  • After the ribs come to room temperature, apply more sauce before cooking them. This will not only help to retain some moisture but also enhance the flavor.
  • Use a heavy-duty aluminum foil while reheating. This will improve the quality of the final result of the reheated ribs.
  • The reheating process can be different and the duration in the case of the ribs being refrigerated or frozen.
  • If the ribs are planned to be reheated, put them in an air-tight container after wrapping them tightly with heavy-duty aluminum foil.
  • Sealing in a vacuum pack and storing the cooked ribs in the freezer can extend the shelf life of ribs from 2 months to 3 months.
  • When keeping a cooked rib in a refrigerator, coat them with sauce to multiply the flavoring later on.
  • When cooking with water, add aromatics, herbs, and other spices to uplift the flavor.